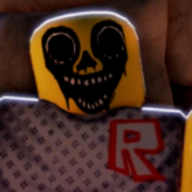
What does the wooden crucifix do in Night At The Infirmary?
Banishes confirmed anomalies after vitals or behavior fail. It is the exorcism tool — not a Sanity item.

Every Night At The Infirmary item exists to either treat real patients, detect anomalies, or recover Sanity during a night shift. There is no separate "adventure inventory" — everything lives on the infirmary desk, operating room trays, or wall mounts.
Beta UPD 1 on Roblox gives you a full clinic kit from Night 1: registration terminal, IV pump, heart monitor, temperature probe, night vision, cast materials, bed sanitizer, and the wooden crucifix for exorcisms.
Items unlock in context. The phone tutorial on your first shift explains vitals thresholds; Night 2 adds shapeshifters that ignore device readings — see the Night 2 guide for when tools lie.
This Night At The Infirmary items wiki hub catalogs each tool, normal readings, and when to stop treating and start exorcising. Cross-link to patients for named NPC examples and codes for SHARDS that may unlock cosmetics later.
Understanding item order matters as much as owning items. Beta players with identical tool access fail nights because they dip fiberglass before reading temperature — the items wiki is really a sequence guide disguised as a gear list.
A.D. Games built Night At The Infirmary (Anomaly) around medical props, not combat weapons. Every horror beat ties back to something on a tray, wall, or desk — learn where each sits on the map so scares do not send you searching blind.
Three item combos appear in nearly every successful Beta run:
Combo A — Honest human — IV → monitor (plausible BPM) → temperature (~37) → full cast → optional bed spray for Sanity. Used for first Dale or Casey cases.
Combo B — Vital anomaly — IV → monitor (0 or absurd BPM) → crucifix → bed spray. Skip cotton and fiberglass entirely — they waste clicks and Sanity.
Combo C — Night 2 suspicion — Register → IV → monitor (maybe green) → temperature (maybe green) → stop if identity fails → deny or crucifix without cast. Night vision optional; behavior mandatory.
Failed combos include: fiberglass before monitor, crucifix after cast complete, night vision before temperature, sanitizer skipped after exorcism.
Memorize combos as muscle memory — controls page lists click order; this page lists decision order.
Real patients arrive with broken arms and legs — the operating room workflow is item-heavy:
IV pump — connect first so fluids flow during limb work. Anomalies may twitch or flatline while connected; watch the monitor.
Heart monitor leads — clip to the patient before setting bone. Provides live BPM for anomaly checks.
Limb setting tools — click prompts to snap bones back into place. Painful animations precede casting.
Stockinette — inner wrap layer applied directly to skin.
Cotton roll — padding over stockinette before rigid cast.
Fiberglass roll + water bucket — dip roll, apply outer cast, wait for hardening prompt.
Finish every step only when vitals look human. If BPM spikes to nonsense values mid-cast, abandon wrapping and switch to the crucifix.
| Item | Use | Anomaly hint |
|---|---|---|
| IV pump | Fluids during OR | Twitching lines while BPM wrong |
| Heart monitor | Live BPM | 0 or absurd spike = exorcise |
| Stockinette / cotton | Cast prep | Patient face changes mid-wrap |
| Fiberglass roll | Hard cast finish | Stop if vitals fail before dip |
Anomaly detection items read patient state. They are mandatory on Night 1 and still useful on Night 2 — just not sufficient alone when shapeshifters appear.
Heart monitor — Primary tell. Normal humans sit in a believable BPM range. Zero or billions means exorcism, not more casting.
Temperature gun / probe — Aim for ~37°C (~98.6°F). Fevers beyond human range or frozen readings flag anomalies instantly.
Night vision goggles — Toggle for dark OR corners and hallway peeks. Reveals entities, shadows, or "acting funky" movement. Also shows hallucinations — do not trust every shadow; confirm with vitals when possible.
Detection order for beginners: register → IV + monitor → temperature → night vision if unsure → cast OR crucifix. Full ladder on how to detect anomalies.
The wooden crucifix is the only item that banishes confirmed anomalies. The phone tutorial calls it a "casual little exorcism" — in practice it is your emergency stop button.
Grab the crucifix from the OR wall or desk mount when vitals fail, faces distort, or a shapeshifter slips through registration. Follow the on-screen prompt — successful exorcisms show an anomaly banished style message in Beta footage.
Exorcise before wasting cast materials on entities. Failed or delayed exorcisms drain Sanity and may let the anomaly possess the player camera briefly.
The crucifix does not replace denial at the front desk. If a faceless patient or obvious wrong identity arrives, reject registration when the UI offers deny — save the crucifix for mid-treatment reveals.
Entity-specific pages will expand in Phase 2. Until then, treat any vital mismatch as crucifix-eligible.
Sanity is not an item you equip — but several interactables restore it:
Bed sanitizer spray — Clean blood, stains, or residue after exorcisms. Beta players report visible Sanity gains after spraying beds down.
Desk comforts — Coffee or similar breaks between waves (availability varies by build). Use during phone lulls.
Pausing night vision — Constant goggles use drains focus; toggle off when vitals are confirmed clean.
Sanity loss comes from jumpscare bells, staring at faceless patients, wrong treatment, and electrical room events. See the dedicated sanity guide.
Item hygiene matters: a crucifix exorcism without follow-up bed cleaning leaves you vulnerable to the next scare. Treat sanitizer as part of the exorcism combo, not optional roleplay.
The cast workflow is the longest item interaction chain in Night At The Infirmary. Each step assumes prior steps completed:
After IV and monitor, limb set is the first physical manipulation — anomalies often reveal here because the game forces close camera proximity.
Stockinette and cotton are quick clicks but lock you into "medical mode." If you have not temperature-scanned yet, pause before stockinette — fiberglass is point of no return.
The water bucket dip is the final commitment. Beta UI highlights the bucket when ready. Anomalies that hid vitals until now often break here — keep one hand on crucifix mentally.
Real patients like Dale Gutierrez (broken arm) and Casey Morris (broken leg) use identical item chains — only vitals differ. Learn the chain once; apply to every injury type in UPD 1.
| Step | Item | Can abort? |
|---|---|---|
| 1 | IV pump | Yes — before cast |
| 2 | Heart monitor | Yes — read BPM first |
| 3 | Limb set | Yes — common reveal point |
| 4 | Stockinette | Yes — check temp if skipped |
| 5 | Cotton roll | Risky — exorcise if unsure |
| 6 | Fiberglass + bucket | No — finish human or exorcise before |
On Night 2, three detection items may read clean on shapeshifters:
Heart monitor — Plausible BPM despite wrong identity.
Temperature gun — ~37 on entities mimicking prior patients.
Night vision — May stay quiet until behavior slips — or show hallucinations on unrelated patients.
Items that never lie about being needed: IV and cast tools still apply to real injuries. The wooden crucifix still banishes once you decide — the decision is harder, not the button.
Strategy: use items for workflow speed on trusted cases; use deny and memory for suspicious duplicates. See Night 2 guide.
Night 2 does not remove items from the OR — it removes certainty. Keep connecting monitor and gun out of habit, but interpret green readings as "proceed with caution" not "proceed with fiberglass."
Wooden crucifix and bed sanitizer become more important on Night 2 because behavioral detection takes longer — more time in OR means more jumpscare windows and Sanity bleed.
The front desk is an item cluster: registration terminal, accept/deny buttons, and the ringing phone for shift briefings.
Answer the phone at shift start — Night 1 explains vitals; Night 2 warns about shapeshifters and faceless patients. Ignoring it skips lore and mechanics hints.
Registration shows name cards — Dale Gutierrez, Casey Morris, Ariana, etc. Compare names to faces before accepting. Deny when dialogue contradicts the card.
Some patients mention VIP Robux payments or fan bases — flavor text, not items you manage. Focus on vitals and behavior instead.
Map layout for desk placement: Night At The Infirmary map. Controls for each button: controls guide.
| Desk tool | Function | Linked item |
|---|---|---|
| Phone | Tutorial + night briefings | — |
| Registration UI | Accept / deny patients | Name card |
| Accept button | Send to OR | IV + monitor in back |
| Deny button | Reject at window | Stops some anomalies early |
This Night At The Infirmary items wiki page documents every treatment and detection prop in Beta UPD 1 for Roblox players learning the night doctor role. Items are not collectibles — they are sequential UI interactions tied to the operating room and registration desk. Understanding item order prevents Sanity collapse more reliably than memorizing jump-scare timings.
The wooden crucifix remains the only banish tool when vitals fail or when Night 2 behavior confirms a shapeshifter you already accepted. Heart monitor and temperature gun remain honest on Night 1 and partially honest on Night 2 — shapeshifters are the documented exception, not the monitor's default state.
IV pump and cast materials exist to sell the medical fantasy and to pace horror reveals mid-chain. Stockinette and cotton are not flavor clicks; they are commitment timers that ask whether you already confirmed humanity. Fiberglass dip is the final commitment — exorcise before dip if any tell fired earlier.
Bed sanitizer spray ties items to Sanity recovery — see the sanity guide for meter math — but mechanically it is still an item click on a bottle then a stain. Night vision goggles tie items to optional detection — tutorial voice warns hallucinations; wiki repeats that warning because players over-trust goggles after one lucky catch.
Registration deny is listed on items hub because it prevents wasted OR item chains — treat deny as the first item in a Night 2 toolkit when identity fails. Accept remains the default Night 1 path because vitals still tell truth there. Cross-link to Night 2 guide when device trust drops.
UPD1 SHARDS from the codes page may future-unlock cosmetics but do not change July 2026 item placement on walls and trays. Revisit this wiki items hub after Roblox title changes from UPD 1 to UPD 2 — new trays may appear; old sequences usually remain for tutorial nights.
When Night At The Infirmary queues stack three patients deep, item discipline separates clears from summary-screen failures.
Keep IV and monitor hooks visually confirmed before reading dialogue — shapeshifters talk while you should be watching BPM digits.
Temperature gun often spawns as a glowing prompt — if you never see the glow, you may have skipped monitor; back up one step.
Night vision hallucinations can mimic extra limbs — only crucifix after vitals fail, not after shadows alone unless mid-cast body horror confirms.
Fiberglass bucket dip animation locks input briefly — that window is when bell scares hit; do not panic-add extra clicks.
Crucifix equip animation is shorter than full cast — speed exorcism learners beat speed cast learners on Night 2.
Sanitizer bottle respawns on same wall hook — if bottle missing, check bed stains first; some builds require exorcism complete before spray unlocks.
Desk coffee if present cannot outheal triple anomaly streak — spray beds instead.
Item order is identical for Dale arm and Casey leg — limb prompts swap but tool sequence does not.
Deny at desk saves IV stock for real humans — metaphorically; actual IV is infinite, your Sanity is not.
Wooden crucifix voice lines joke about exercise — ignore wording; click until banish confirm.
UPD1 SHARDS do not upgrade monitor accuracy — accuracy is night-number gated via shapeshifter rules, not SHARDS.
Re-read how to detect anomalies when item order feels wrong — detection page is algorithm, items page is hardware.
Night 2 item trust table lives above in night2-trust section — bookmark both during first Night 2 attempt.
If A.D. Games adds new tools in UPD 2, this deep-dive updates first — watch updates.
The Night At The Infirmary items wiki hub exists because Beta players confuse treatment order more often than they confuse item names. Every tool has one job; the horror comes from using the right job in the wrong second.
Registration is not an item, but it gates items. Accepting a Night 2 duplicate before you reach the OR wastes every tool click that follows. Deny is the cheapest item in the game when identity fails.
IV pump establishes the medical fiction — you are a doctor, not a bouncer. Anomalies participate in IV fiction until vitals or behavior break. Connect IV before debating philosophy.
Heart monitor is the tutorial's favorite tell because 0 BPM on a talking patient is unmistakable. Billions BPM jokes are unmistakable too. Shapeshifters are the exception, not the monitor's default.
Temperature gun rewards discipline. Players who skip it because BPM looked fine once are the same players posting "how did that patient explode mid-cast?" on forums.
Night vision is the only item the supervisor explicitly distrusts. Treat goggles as a magnifying glass on doubt, not proof. Hallucinations mean you can waste a crucifix on shadows if vitals were clean.
Stockinette, cotton, and fiberglass are sequential commitments. Each click is the game asking "are you sure this is human?" after you should already know.
Crucifix is not a failure item — it is a success item when used early. Banishing an anomaly is completing the case correctly, not losing the case.
Bed sanitizer is the most underrated item in Night 2. Players who exorcise well but skip spray enter the next shapeshifter debate with half Sanity already gone.
Coffee and desk comforts vary by build — do not plan a night around them. Plan around spray, pauses, and human cast completions instead.
SHARDS from UPD1 may buy future comforts — see codes — but cannot buy correct click order. Learn items on Night 1; test item trust on Night 2.
Map placement helps muscle memory: crucifix wall near bed means exorcism is a swivel, not a sprint. See map before your first serious attempt.
Controls are item clicks — controls guide lists the same chain in input language rather than prop language.
Patient names do not change item rules — patients hub lists who appears, items list how to survive whoever appears.
Tier list ranks shapeshifters S partly because items lie — tier list explains why monitor green is not item success on Night 2.
This reference block consolidates every Night At The Infirmary item interaction for second-screen use during long Night 2 shifts.
Registration terminal — Not a physical prop you carry; click UI at desk. Starts patient record before OR.
Phone — Click to hear tutorial. Items are not involved — but briefing defines how you use monitor, gun, and crucifix later.
IV pump — First OR connection on nearly every case. Anomalies and humans both get IV first in Beta footage.
Heart monitor — Second connection. Read BPM before limb set. Zero or absurd values = stop treatment chain.
Temperature gun — Third check when prompt appears. ~37 normal; anything wildly off = crucifix.
Night vision goggles — Optional fourth check. Less consistent; hallucinations possible.
Limb set tool — Contextual click on broken arm/leg. Common shapeshifter reveal point even when vitals green.
Stockinette — Cast layer one. Do not reach if vitals already failed.
Cotton roll — Cast layer two. Same abort rules.
Fiberglass roll and bucket — Final cast. Point of no return for human treatment.
Wooden crucifix — Banish tool. Overrides cast chain anytime anomaly confirmed.
Bed sanitizer spray — Post-exorcism Sanity restore. Click bottle then bed stains.
Deny button — Desk-only "item" — prevents OR chain entirely for obvious Night 2 fails.
Banishes confirmed anomalies after vitals or behavior fail. It is the exorcism tool — not a Sanity item.
They read normal on devices. That is why Night 2 relies on identity tells — see the Night 2 guide.
Beta codes like UPD1 grant SHARDS — check the codes page after each patch for redeem rewards.
No. Use it when vitals feel wrong or the OR is dark. Overuse worsens Sanity on long shifts.
Operating room wall mount within reach of the bed — grab via click when exorcism prompt appears.
Matched by build plan, shared topics, and guide progression — not random related links.